
How to Buy
How to buy or rent our services1. Choose Your Package and Location by clicking “Sign Up Now” button
2. You will then be brought to this screen
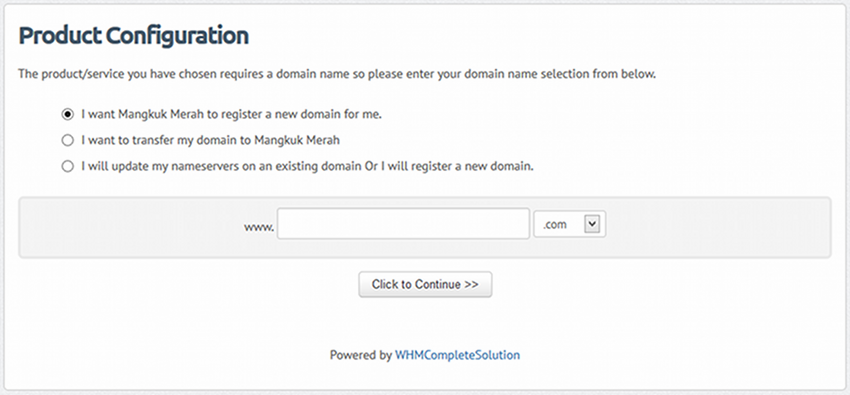
- Choose the first option if you still don’t have any domain and you would like to register your domain along with renting one of our hosting package
- Choose the second option if you would like to transfer your already registered domain along with renting one of our hosting package
- Choose the third one if you already have a domain and you only want to rent our hosting package
3. Enter your domain name and choose your extension, click the “Click to Continue” button.
4. In the event you chose the first option, you will then be presented with information whether your domain is available for order or not. In the event of your domain is no longer available, you will then be presented with various available alternatives. Click the “Click to continue” button to proceed.
5. You will then be presented with this screen
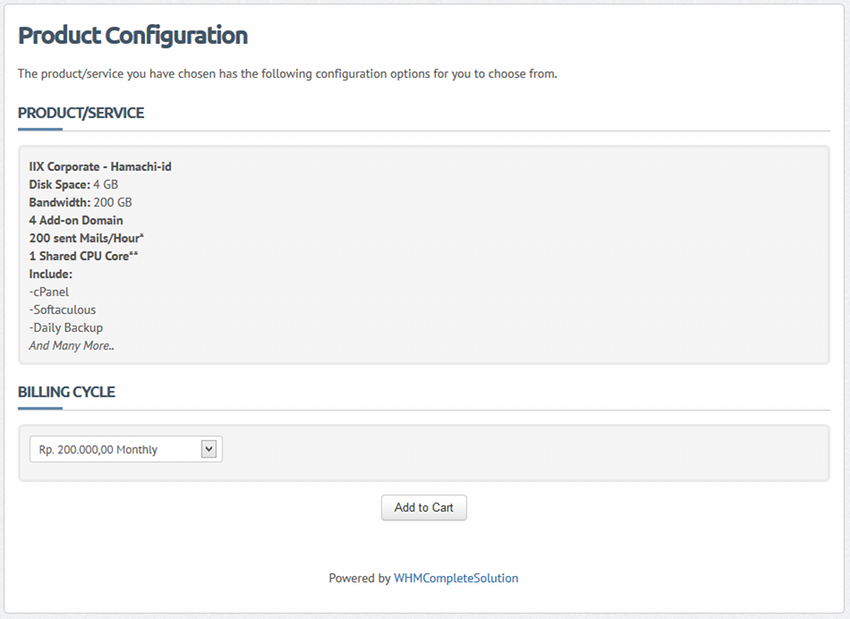
Choose your billing cycle either monthly, quarterly, semi-annually, annually with 10% discount and biennially
6. Click “Add to Cart” to continue
7. You will then be brought to the domain configuration screen in the event of you chose the first and second option on point number 2.
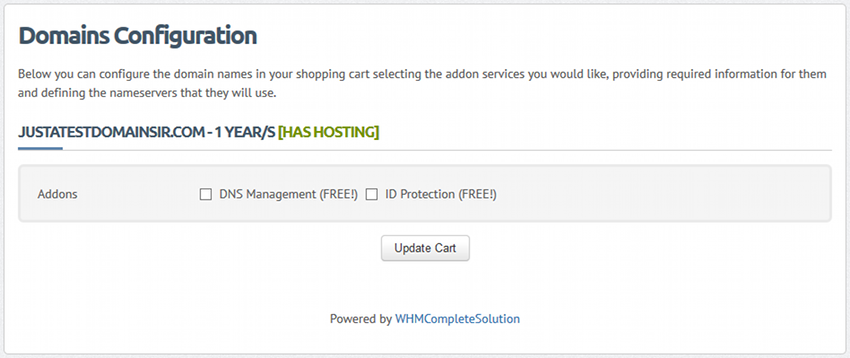
- Since you are planning to buy a hosting along with your domain, you can just leave the DNS Management feature off.
- Turn on the ID Protection feature if you prefer your name and email address not to be displayed on WHOIS query. If you prefer your name and/or business address to be displayed on any WHOIS query, leave the option off.
8. Click “Update Cart” to continue
9. You will now enter the order summary screen
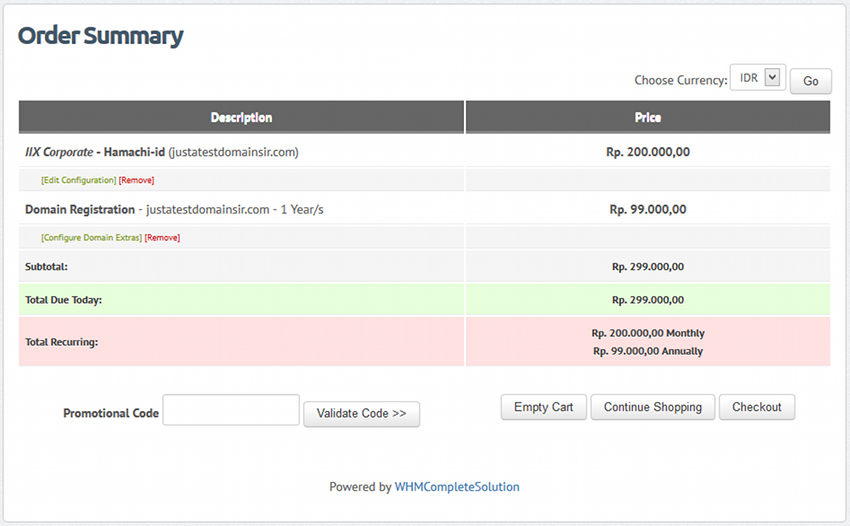
- If you have any promotional discount code, enter the code into the Promotional Code field and click “Validate Code”, the order summary will then be refreshed over to display your order along with the discount you get using the promotional discount code. You can always check our Twitter page for any discount offer.
- You can reconfigure your billing cycle by clicking “Edit Configuration” link just below your hosting package summary.
- And you can also reconfigure the domain extras in point 7 by clicking “Configure Domain Extras” just below your domain summary.
10. If you are satisfied with your order summary, click “Check Out” to go to the next screen or “Continue Shopping” to shop for another of our services and add it to your current order.
11. You will then be brought to the Check Out Screen where you must fill your account details such as Name, Company/Organization, Address, Email Address and so on. Please refer to our Legal page for Privacy Policy.
12. Still on the same screen, choose your payment method. We currently accept three local Indonesian bank as well as PayPal.
13. Checked the “I have read and agree to the Terms of Service” checkbox once you’ve read our Terms of Service and agree to be tied under contract to all the points stated in it.
14. Click “Complete Order” to finish your order and to the invoice page.
15. You may now pay your invoice using either Bank Transfer to these bank:
·1. Bank BCA
7650333599 a/n Anangga Pratama
BCA KCP Depok Asri
·2. Bank Mandiri
1270004814073 a/n Anangga Pratama
Mandiri KCU Cilandak
·3. Bank BNI
0209834474 a/n Anangga Pratama
BNI KCP Depok II
or by clicking the Pay Now button in your Invoice if you prefer to use PayPal instead.
16. Once you have paid your invoice, please let us know by confirming your payment through the Payment Confirmation page.
17. Give us some time to verify your payment. Once we verify your payment, we will activate your account immediately.
1. Click the Buy button from the domain page and you will be presented with this screen
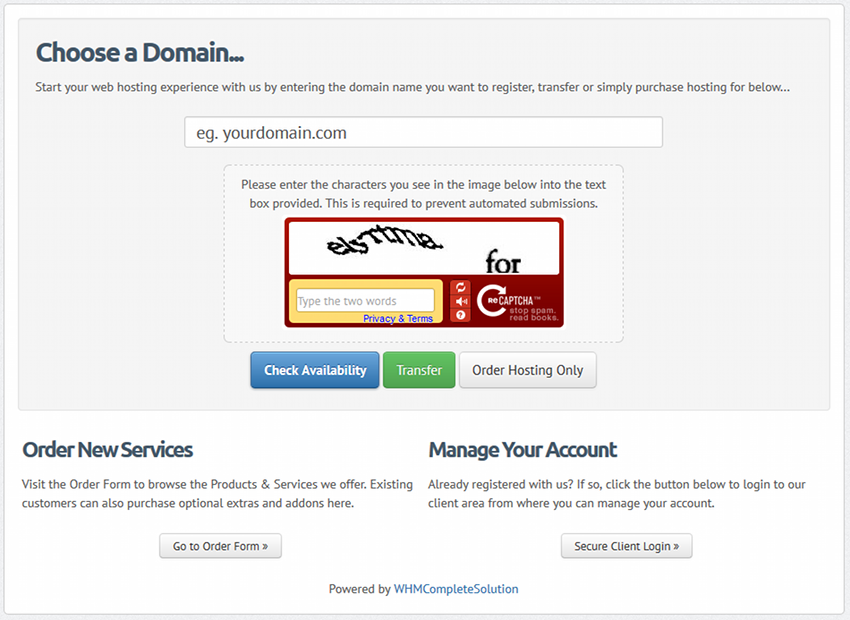
- Enter the domain name you want to register or transfer along with its extension
- Please enter the characters you see in the image below the domain field into the text box provided. This is required to prevent automated submissions.
- Click “Check Availability” to start the register process or “Transfer” to start transferring your domain
2. On the next screen after clicking the “Check Availability” button, you will see whether your domain is available to register or not. In the event of your domain is no longer available to register, you will be presented with some alternatives extension you could use.
You can also change the billing cycle on the same screen.
Click “Order Now” to continue.
3. You will now see a screen that look like this
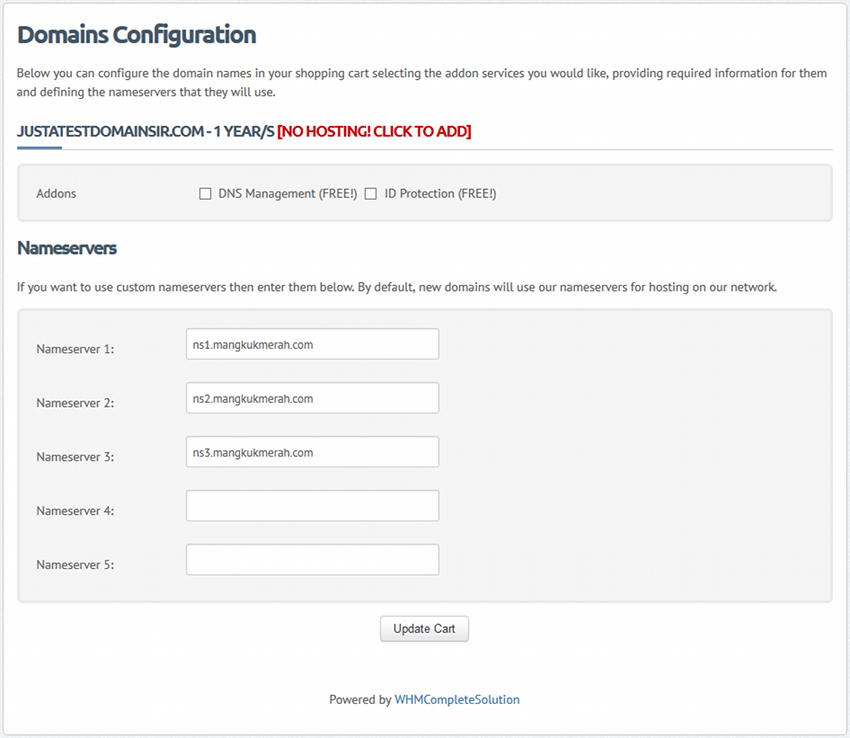
- If you are planning to buy a hosting along with your domain, you can just leave the DNS Management feature off, otherwise, you will have to turn on the DNS Management feature to have a DNS Management capability via the portal so that you can connect it to various third party services such as Tumblr or Blogspot.
- Turn on the ID Protection feature if you prefer your name and email address not to be displayed on WHOIS query. If you prefer your name and/or business address to be displayed on any WHOIS query, leave the option off.
Fill your nameservers on the nameserver section with :
- If you are planning to rent our hosting package or to use the domain as your add-on domain in our hosting package, leave the nameservers as ns1.mangkukmerah.com, ns2.mangkukmerah.com, ns3.mangkukmerah.com.
- If you are planning to use a hosting service from another provider, change the nameservers accordingly to what your hosting provider have specified
- If you are planning to use a third party services such as Tumblr custom domain, change the nameservers to ns1.mangkukmerah.net, ns2.mangkukmerah.net, ns3.mangkukmerah.net and ns4.mangkukmerah.net to have the DNS Management feature works.
- In the event you order a .id domain and would like to have the DNS Management feature to work, you will have to fill the nameservers field with : id1.mangkukmerah.net, id2.mangkukmerah.net, id3.mangkukmerah.net, id4.mangkukmerah.net
Once you are done with the configuration, click “Update Cart”
4. You will now see the order summary.
- If you have any promotional discount code, enter the code into the Promotional Code field and click “Validate Code”, the order summary will then be refreshed over to display your order along with the discount you get using the promotional discount code. You can always check our Twitter page for any discount offer.
- If you are satisfied with your order summary, click “Check Out” to go to the next screen or “Continue Shopping” to shop for another of our services and add it to your current order.
5. You will then be brought to the Check Out Screen where you must fill your account details such as Name, Company/Organization, Address, Email Address and so on. Please refer to our Legal page for Privacy Policy.
6. Still on the same screen, choose your payment method. We currently accept three local Indonesian bank as well as PayPal.
7. Checked the “I have read and agree to the Terms of Service” checkbox once you’ve read our Terms of Service and agree to be tied under contract to all the points stated in it.
8. Click “Complete Order” to finish your order and to the invoice page.
9. You may now pay your invoice using either Bank Transfer to these bank:
·1. Bank BCA
7650333599 a/n Anangga Pratama
BCA KCP Depok Asri
·2. Bank Mandiri
1270004814073 a/n Anangga Pratama
Mandiri KCU Cilandak
·3. Bank BNI
0209834474 a/n Anangga Pratama
BNI KCP Depok II
or by clicking the Pay Now button in your Invoice if you prefer to use PayPal instead.
10. Once you have paid your invoice, please let us know by confirming your payment through the Payment Confirmation page.
11. Give us some time to verify your payment. Once we verify your payment, we will activate your account immediately.
12. If you order .id extension, please make sure to upload your documents via our portal or the .id domain panel for the .id domain authority approval. You can also ask for our help in uploading your documents via the ticketing system.
It will take from a few hours to a day or two for the document approval by the .id domain authority which is a third party involved and not in any means one of our representative.
1. Choose either RapidSSL or PositiveSSL from our SSL page.
2. You will then be presented with this screen
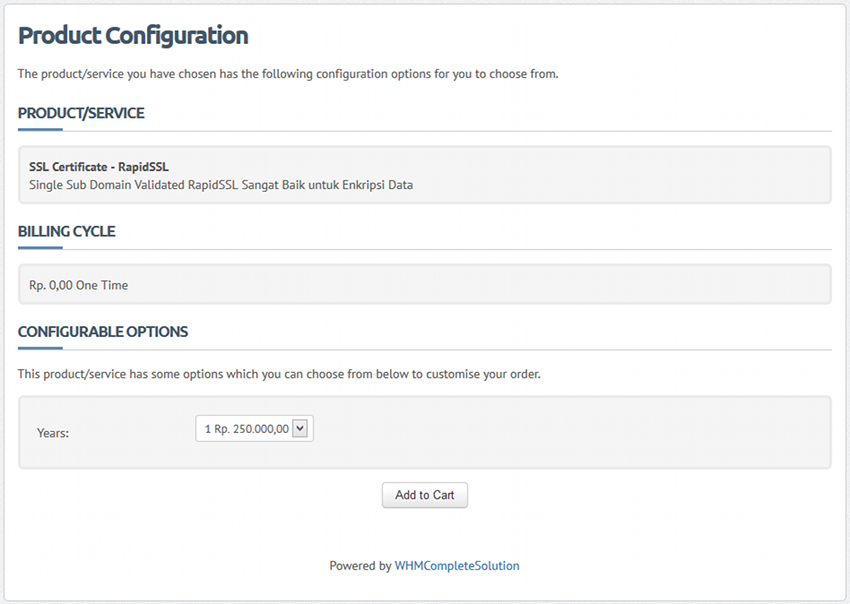
If you want to change how many years your certificate will be active, please look at the Configurable Options area and choose the year you would like the certificate to be active, either a year, two years or three years.
Click “Add to Cart” to continue
3. You will now see the order summary.
- If you have any promotional discount code, enter the code into the Promotional Code field and click “Validate Code”, the order summary will then be refreshed over to display your order along with the discount you get using the promotional discount code. You can always check our Twitter page for any discount offer.
- If you are satisfied with your order summary, click “Check Out” to go to the next screen or “Continue Shopping” to shop for another of our services and add it to your current order.
4. You will then be brought to the Check Out Screen where you must fill your account details such as Name, Company/Organization, Address, Email Address and so on. Please refer to our Legal page for Privacy Policy.
5. Still on the same screen, choose your payment method. We currently accept three local Indonesian bank as well as PayPal.
6. Checked the “I have read and agree to the Terms of Service” checkbox once you’ve read our Terms of Service and agree to be tied under contract to all the points stated in it.
7. Click “Complete Order” to finish your order and to the invoice page.
8. You may now pay your invoice using either Bank Transfer to these bank:
·1. Bank BCA
7650333599 a/n Anangga Pratama
BCA KCP Depok Asri
·2. Bank Mandiri
1270004814073 a/n Anangga Pratama
Mandiri KCU Cilandak
·3. Bank BNI
0209834474 a/n Anangga Pratama
BNI KCP Depok II
or by clicking the Pay Now button in your Invoice if you prefer to use PayPal instead.
9. Once you have paid your invoice, please let us know by confirming your payment through the Payment Confirmation page.
10. Give us some time to verify your payment. Once we verify your payment, we will activate your account immediately.
11. Once we have activated your account, you will receive an email to your inbox with an SSL configuration link that looks like this: https://portal.mangkukmerah.com/configuressl.php?cert=HASHEDNUMBERS
Click that link to configure your SSL certificate signing request.
12. You will then be presented with this screen
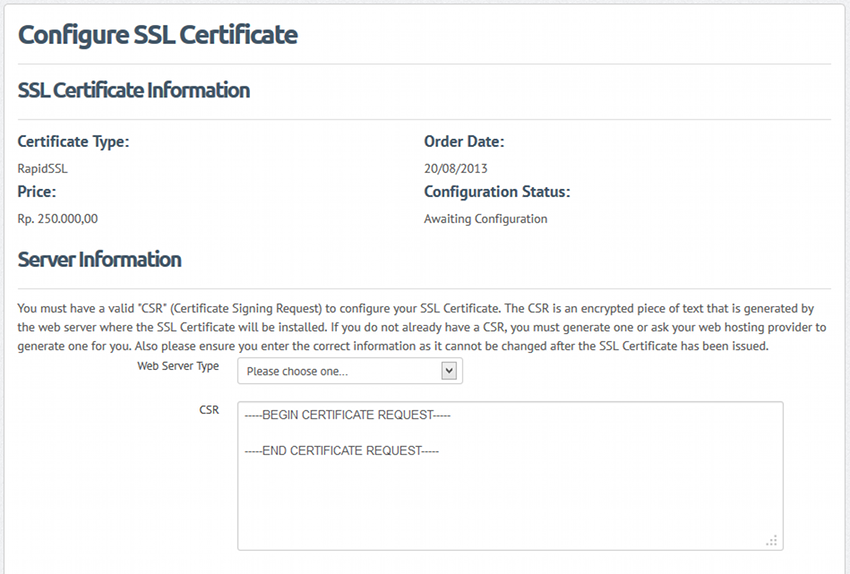
- Choose your webserver, normally cPanel/WHM
- Generate your Certificate Signing Request via your panel or your server. If you already have a hosting account with us, we will do this for you for free. Just buzz us via the ticketing system or Live Chat.
- Paste your CSR into the CSR field.
- Fill out the administrative contact information. The contact information will not be displayed on the Certificate – it is used only for contacting you regarding this order. The SSL Certificate and future renewal reminders will be sent to the email address specified in it.
Click “Click to Continue” to proceed with your SSL configuration.
13. You will then be brought to this screen
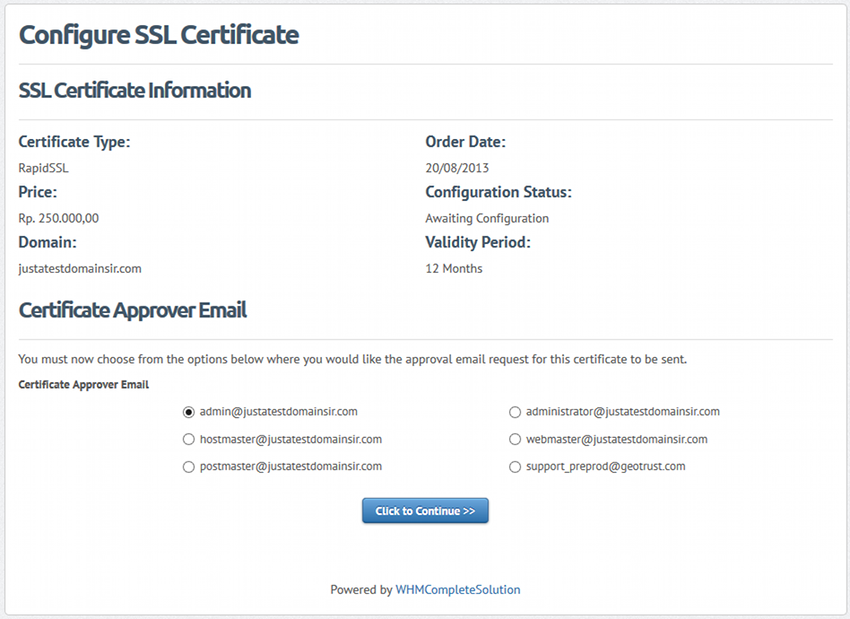
Please pay attention to the Certificate Approver Email section and make sure you already created an email account using one of the stated email addresses there.
Once you choose your certificate approver email, click “Click to Continue” to end your SSL configuration.
14. Open your Approver Email account and check for an email from the SSL authority where you order their product from.
You will then see an approval link you should click stated on the email. Click that link and follow the instruction stated on the approval page.
15. Once you have finished all the instruction given by the SSL authority to proceed with your SSL certificate, you will now have to wait for a while for the SSL Authority to issue your certificate. It could take from a few minutes to 2×48 hours for DV certificate depending on the condition and the SSL authority decision.
16. If the SSL Authority approves your request, you will get an email with your SSL certificate details. You can also check our portal for your SSL certificate details, download, re-issuing and much more. Refer to the image below:
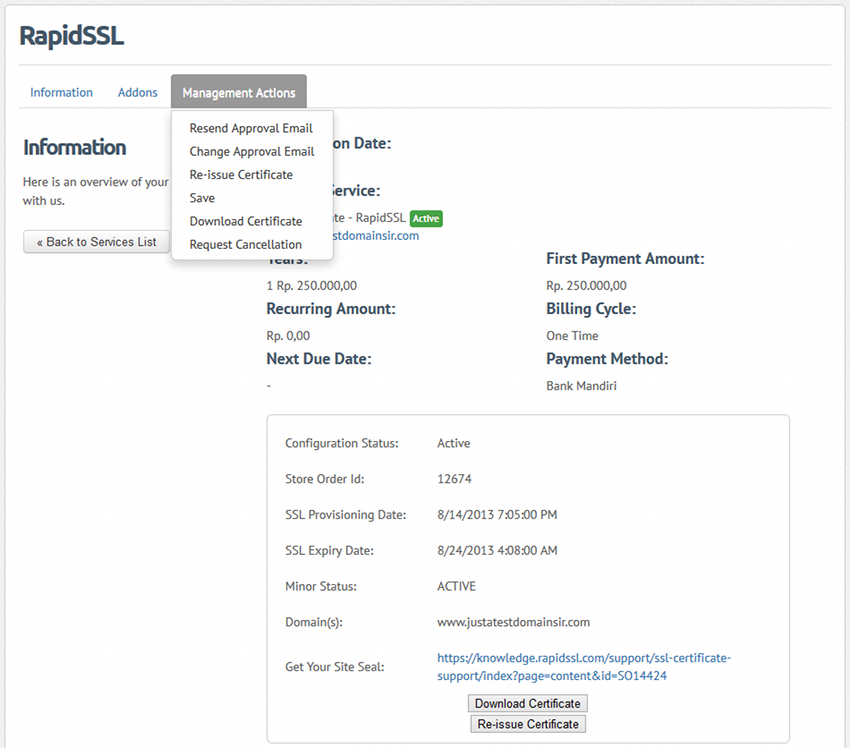
17. If you have your hosting account/managed services with us along with dedicated IP add-on, we will help you install your certificate for free. If you have your hosting account on another provider, please refer to that provider for help in installing your certificate.